Understanding Image Optimization Settings
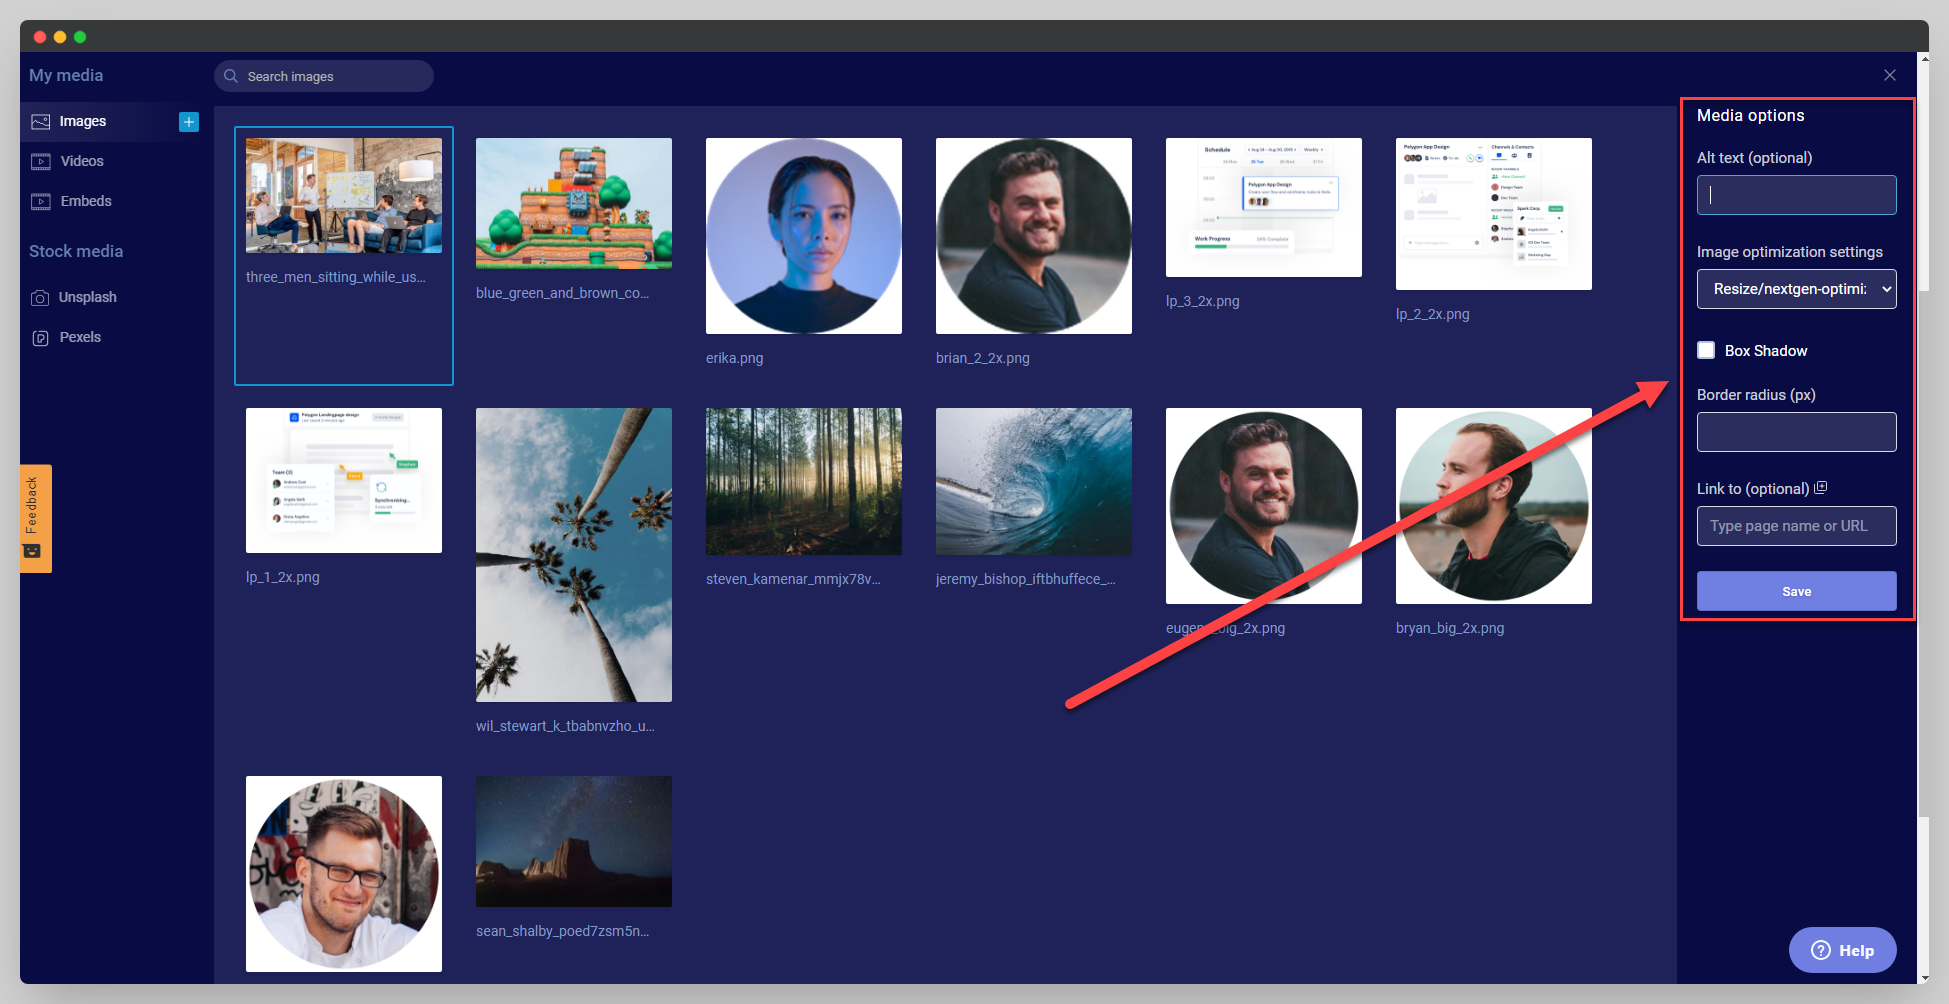
When working with images in Studio, there is an option to apply an Image Optimization Setting to the images being used. The options here can drastically improve the load-times and page-speed of your site on both desktop and mobile.
However, when used with very detailed images, the optimization process can cause the image to become blurry or grainy. If this happens to you, we recommend that you set the images optimization setting to either Resize Only or Do Not Resize/Optimize. Keep in mind that doing so may slow down the page where the image is used.
How to access your optimization settings:
You'll need to select the optimization setting you want to use every time you upload a new image to Studio. To access this setting, insert any media component and insert a new image.

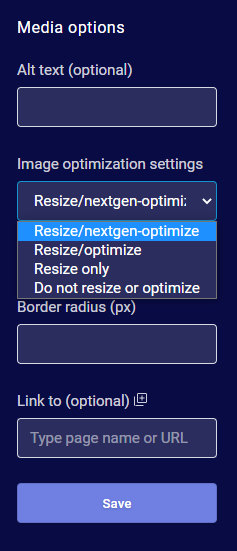
| Image Setting | Descriptions |
|---|---|
| Do not resize or optimize | Only the original image is used, exactly as uploaded. |
| Resize/nextgen-optimize | Allows you to add a "nextgen" image format (WEBP) as an alternate media source to take advantage of browsers supporting this format. |
| Resize/optimize | Resizes and applies a compression algorithm (e.g. JPG compression) to reduce the image size. |
| Resize only | Resizes the image to fit in the width/height needed for where it's being used. This is the default |
We follow these rules most of the time
We say most, because there are some additional processes at play here for determining how best to optimize an image. Here's a technical explanation from our dev team about one of these processes and why the setting you define might not convert the image to a quicker format:
Our image optimization tool does a color profiling analysis to identify graphic images (e.g. low-color-depth illustrations and charts), and will apply the appropriate indexed color optimizations in PNG format rather than applying a photographic optimization format (e.g. JPG, WEBP) to the image, to maintain the image quality while minimizing the size of the download.
